Monday, February 13, 2012

Homemade Liquid Laundry Detergent

I finally did it....finally broke down and tried the liquid laundry detergent recipe from the Duggar Family website! I've used about 1/2 gallon so far and I like just as well as the store bought but I LOVE the price! I was clipping coupons, but this is even cheaper than taking time to clip coupons and not much more trouble. I spent $8 on the supplies and it made about 10 gallons. I think the next time I may cut back a little on the water because it was pretty thin. I measured it out into gallon jugs before pouring into liquid laundry detergent bottles I had saved up. That way I could measure exactly & shake well before pouring into bottles. I didn't add any essential oils for fragrance, but I'm thinking I may try some lavender and vanilla some time. I will let you know the amounts when I try it. I tried a recipe for fabric softener and I'm not too thrilled with it, so I am still on the lookout for a good fabric softener recipe. Next on the agenda....homemade dishwasher liquid! Here's the recipe I used for the laundry detergent:

Ingredients:

4  Cups - hot tap water
1  Fels-Naptha soap bar
1 Cup Arm & Hammer Super Washing soda
½ Cup Borax

I found all these items at wal-mart in the laundry detergent aisle for less than $8 total. The next time you make soap, all you will have to buy is another bar of soap for about $2. There was plenty of both to make several recipes of this.

Grate the entire bar of soap and add to about 4 cups of hot water on stove. Stir continually over medium-low heat until soap dissolves and is melted. Stir slowly so you won't get a bunch of bubbles!

When the soap has completely dissolved, fill a 5 gallon bucket half full of hot water. Add melted soap, Super washing soda & Borax. Stir well until everything is mixed. (I used a big wood dowel I had on hand to stir but may get a paint mixer attachment for the drill next time.) Fill bucket almost to the top with more hot water. Stir again, cover and let sit overnight to thicken.

The next morning, stir again and fill container half full with soap and then fill rest of way with water. Shake before each use. (this is where I used the gallon milk jug. I measured out 1/2 gallon of water, poured it into the jug, then marked the halfway point with a sharpie. That way I could pour the detergent concentrate to the fill mark, then fill with water.)

If you want,  you can add your favorite essential oil to the containers.

This recipe makes 10 gallons.

To use:

Top Load Machine- 5/8 Cup per load (Approx. 180 loads)

Front Load Machines- ¼ Cup per load (Approx. 640 loads)


Wednesday, February 8, 2012

Big tree...and a chicken casserole recipe!

I found this awesome tree the day before yesterday and it was almost dark, so went back yesterday and it was even bigger than I thought! Its hard to tell in this photo, guess I need to measure it and see how big it really is! I wonder how old it is? It appears to be dead, so don't know how much longer it will be there....

I'm still eating from the meals I put in the freezer. They are good and I haven't eaten out once since I started this and neither has my husband! He used to go almost every morning for breakfast and coffee and I guess that was the main thing that made me want to do this. I know its not healthy to eat those greasy biscuits every morning. I normally get up with him, but didn't feel like it this morning, but it was easy for him. I had the coffee ready and I just put some french toast from the freezer into the oven wrapped in aluminum foil and got back in bed. Easy enough for me!

The recipe I'm sharing today is one I got from my mother-in-law, but I know a lot of people make it. I made some minor changes and added some broccoli. Frozen peas would be good too, but I think next time I will add a bag of frozen mixed vegetables and make it into a "pot pie" casserole!

Chicken & Broccoli Casserole


4-6 chicken breasts

11 oz. can cream of chicken soup

8 oz. Light sour cream

1 roll Ritz crackers

Butter flavored Pam

1 sleeve Ritz crackers

   1/2 package frozen broccoli

Boil chicken until done. Drain chicken and reserve 1 c. broth, cool & tear into bite size pieces. Mix the broth & sour cream. Layer chicken on bottom of the casserole dish, cover with about 1/2 pkg. of frozen broccoli, then pour the broth mixutre over the top. Crush crackers, sprinkle on top and spray with butter flavored cooking spray. Bake at 350 for 40 minutes.

Note: I made 2 of these for me & my husband and split them into 4 small casserole dishes. (I bought them at Wal-mart--they have lids on them, so you can cover with parchment paper then with aluminum foil before putting the lid back on.) Thaw in the refrigerator and cook as above after thawing. I have been getting them out the night before, but 2 days would be even better because they are still somewhat frozen after a day.

Plan to make several chicken dishes at once to save time---boil a bunch of chicken and use it for different recipes. I will be posting more of my favorites as I test them out in the freezer!

Another tip--right now I don't have enough of those small casserole dishes to store everything in them. So I line the pan with some pan lining paper (parchment on one side, aluminum foil on the other) with the parchment paper on the inside. After freezing, I wrap again with aluminum foil and store in freezer bags. When ready to thaw, I take it out of the bag and put it back in the casserole dish.


Monday, February 6, 2012

Homemade frozen pizzas

Like I mentioned, I have been filling my freezer. I am trying to:

1.) Save money by not eating out and going to to grocery store as much

2.) Eat healthier

3.) Save time by not having to cook every night

So far, things are going well! It is so easy to buy those cheap little frozen pizzas for when you are starving and in a hurry, but they are so greasy and full of calories & sodium! So that was one of my first "freezer projects".  First, I made 2 recipes of pizza dough. (Find the recipe for the dough here.) This dough is easy to make, freezes well and tastes so good! I save a couple of dough balls for the freezer for making a bigger pizza for dinner. The rest I cut into smaller portions to make smaller 1 serving pizzas. After letting the dough rise as directed, I made them into small pizzas and cooked in the oven about 5 minutes. After cooling a bit, I added store bought pizza sauce (maybe the next time I will make my own sauce too!), toppings & cheeses. I tried a few different version (spinach, pepperoni, veggie...). After topping them, I wrapped in parchment paper, then aluminum foil and put them all in ziploc gallon freezer bags. (I can get 3 or 4 in a bag.) Both I & my husband have enjoyed them and they are so much better and better FOR you than the ones from the store! You can cook them frozen, but I recommend removing them from the freezer a little while before cooking. Let me know if you try these and how you like them!

I'm still taking my sunset photos....I liked this one from yesterday. I took these at the
boat ramp, so there were boats coming in as I was there and I caught one in the photo. It ALMOST makes me want to go out on a boat....almost!


Wednesday, February 1, 2012

Make Ahead meals

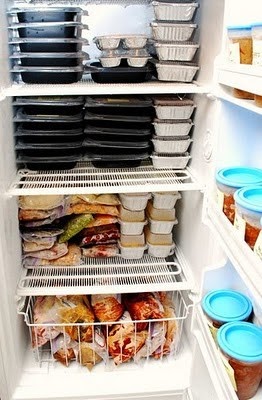
Ever since I saw this photo of someone's freezer on joelens.blogspot.com, I have been
wanting to make some meals and fill my freezer! So I finally made preparations & did it this week! For 3 nights, I cooked extra and prepared it for the freezer. On the first night I cooked a whole bunch of chicken and made chicken enchiladas. That was enough for our supper and 3 dishes for the freezer. I also had enough to make 3 chicken & broccoli casseroles and some chicken left over for my kitty, Mr. Spock. On the 2nd night I cooked a lot of ground beef & turkey and made spaghetti for supper. I had enough left for 2 servings for lunches, 3 dishes of lasagne and several containers of baked beans. Tonight I made homemade pizza dough and we had pizza for supper, so I have 2 crusts to make pizza later, plus I made 7 small pizzas for lunches so we won't have to buy those yucky, greasy frozen pizza for when we are in a hurry. I also made "Aunt Shirley's baked beans" in the crock pot and they are a whole meal with cornbread. I did a few other things, so now I am hoping I can be set to not go to the store for a month except for things to fill in (milk, bread, fresh veggies). I even have several breakfasts in there because I hate getting up early to cook! I will try to get some of my recipes and let you know how they turn out after being frozen. I finished all my cooking tonight, so should be able to use up the food for about 3 more weeks and take it easy and hopefully concentrate on creating now!

We've had a new kitty hanging around for a couple of weeks. I was hoping to find him a home on my own, but my kitties outside were so upset by having him here. Monday I took him to a local no-kill shelter. I was sad to take him, but I know he will find a good home. All his tests were negative, so he is ready to be neutered and start looking for his new home! I wish I could keep them all, but at 13, I am pretty full here. They can get expensive and I want to be able to take good care of the ones I have now. Maybe someday when I am rich and don't have to work.....I am still waiting for that day though!!


Sunday, January 22, 2012

Sunsets....

I am obsessed with taking photos of sunsets lately....there is a good spot across the road from me where I love to go, or its fun to find a new spot some days. My next goal is to learn to take some pictures of the moon. That will be a challenge, haven't had much luck so far! But right now, I am still enjoying the sunsets. Its amazing that they can be so different every day, isn't it?

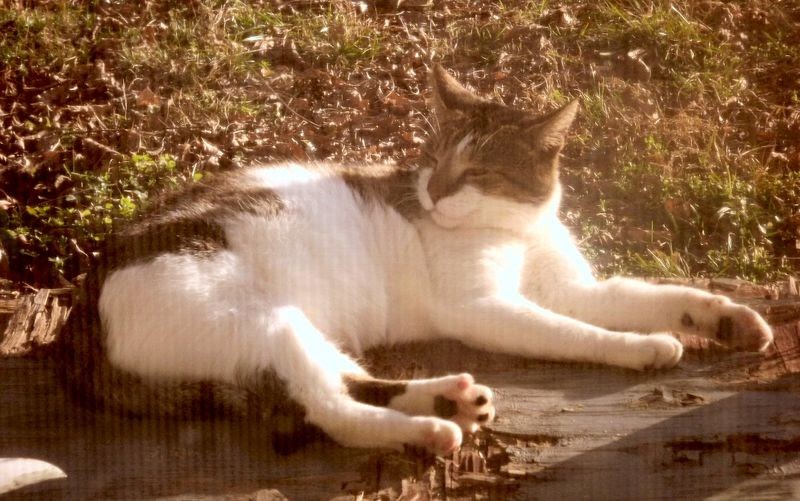
We have had some really warm days lately and its hard to believe it is winter! I'm already thinking about my garden and all the things I can do outside. Its so tempting to plant when its nice, but guess I should wait...Poncho (in the photo) is taking advantage of all these warm days!!

In the meantime, I have some new things to try that I can do inside. First is making some homemade laundry detergent. I am almost out, so will be trying it soon and will let you all know how it works out. I have been doing some early spring cleaning and cleaned out a lot of "stuff" (like my Raggedy Ann collection) from my laundry room. This will make room for things that are needed, now I just need to find a way that looks pretty!!


Saturday, January 21, 2012

Tutorial update

I just updated the post below with the correct link for the Cat Palace tutorial:


http://www.box.com/s/amvu7z2h88jmkbvf16t8


Please let me know if this doesn't work for you!


Friday, January 20, 2012

Turn an old stereo cabinet into a Kitty Palace!


If you prefer the printable pdf version of this project, click here:
 

http://www.box.com/s/amvu7z2h88jmkbvf16t8


 Text version:


1. Gather items needed


Old stereo cabinet, sand paper, paint for outside & accent paint for inside cabinet, paint brushes, newspaper (to put down on floor), fabrics for pillows, hammer, small nails, sewing machine, matching threads, hand-sewing needle, tape, scissors, polyfil, plywood cut to fit back, velcro (sew on kind & sticky back kind.)


2. Choose your paint & fabrics


Remove any unnecessary hardware. Sand all surfaces to be painted. This will scratch up the surface & allow the paint to stick to the surface. Try to get one of your cats to help you sand to make the job go a little faster.
4. Paint Inside of cabinet


Paint inside of cabinet & back panel with your accent color. You can put the back panel on first but I think its easier to paint it, then attach to the back of your cabinet. It will probably take several coats to cover well. Its best if you DON'T let your cats help with the painting. They will be ready for a nap after sanding anyway


 5. Add back to cabinet

6. Paint Outside & back of cabinet 


Paint outside, edges and back (if you want) and allow to dry. If you are going with a light color, it will take several coats. I think I painted mine about 4-5 coats. You can work on the pillows while you are waiting for the paint to dry.

 7. Antique your cabinet


Hold your piece of plywood in place and nail with small nails. You can glue it too if you want...but I didn't want to....


When completely dry, sand the piece a little to make it look old. Especially concentrate on the edges and corners. I didn't sand the inside at all, but you can do that too if you want. I didn't seal mine because I like the flat finish, but if you choose to seal it, do it now, before you add the pillows and be SURE it is dry before moving on.


8. Measure for pillow


 Measure inside your cabinets for the pillows. Add 1/2" to the measurements. For example, my shelves were 13" x 17.5" so I made my pillows 13.5" x 18". I wanted to make my pillows thick, so I added a strip 3.5" wide, but that isn't necessary and I don't think I would do it that way if I had it to do over.

9. Cut fabric & get ready to sew


 Cut out all pieces for your pillow. I made a pillow for the top, but didn't like the look. You might like the look and want to try it. Cut 2 pieces for each pillow. If you want the gusset to make the pillows thick, cut it 3.5" (or the size thickness you want) and long enough to go all around your pillow, plus a little extra. The extra can be easily trimmed away.

10. Add velcro strips


I used 2 sets of velcro strips to hold my pillows in place. (You can leave off this step) I matched a sew on strip to a sticky back strip. Sew 2 strips on the back of each pillow. Stick the sticky back one on the sewn on piece but don't remove sticky back just yet...


11. Sew Pillows


If you are making pillows with 2 pieces, just sew the 2 pieces together with a small opening for turning & stuffing. If you are addign the gusset, pin the strip to the top piece (wrong sides together) and sew all the way around, matching the strip to the corners as you sew. Pin the bottom piece to gussett and repeat, leaving a small opening to turn & stuff. Stuff lightly and hand sew the opening.


 12. Add pillows/final approval


Place pillows on shelves and get final approval on placement. When you get them where you want them remove strip from the sticky back and place on shelf. Press down and mash them firmly against the shelf so they will stay put. Step back and admire your work--along with your cats.

13. Add cats


Place cats on shelves in a pleasing manner....or just wait and they will find the perfect spot!

14. Little extras


I sprayed some catnip spray on the pillows--some like it, some could care less. I thought later that on the taller shelf you could put an eye screw and hang a toy from the top on the inside. You could line the sides (inside) with cork or sisal for scratching. Or you could elminate the pillow in the middle and make a big hole for them to climb through. OR Cut a hole in the side, just above the middle shlf and build some steps for them to climb on to get to the 2nd level!


Note: you are welcome to place this tutorial on your blog or website, but you must link it back to my blog or website (below), give credit to Denise White of the Cat's Pyjamas and you must include all pages,


 www.thecatspyjamas.typepad.com or www.thecatspyjamaspatterns.com


You may not sell this project or tutorial or print in a publication without my permission. Any questions, email denise@scottsboro.org